Project 1: Simple app in pHp/MySQL/Apache in WAMP.
Date : 3 October, 2020
Version: 0.3
By: Albert van der Sel
Doc. Number: Project 1.
For who: for absolute beginners, like Albert.
Remark: Please refresh the page to see any updates.
Status: Almost done.
For your Linux or Windows plaform, you can download LAMP (linux) or WAMP (Windows),
which includes Apache (webserver), MySQL (database) and a programming environment (pHp).
The best things are: it's free software, and it's pretty good !
It's really easy to install, and it's relatively easy to create web applications
using those three environments.
Here is an application which resembles a "Customer/Sales/Order" app. While I have only
just started this app, it can be nice (if you are a beginner) to view the database and objects (like tables),
and browse through some pHp code. My stuff is really easy, but might be nice for a beginner,
in order to get some inspiration.
If you have for example installed WAMP, you might copy the .htm files and .php files into
a webdirectory (like e.g. C:\WAMP64\www), and run "mainprogram.htm" in your browser.
Since you have a real webserver op your PC, you can call that .htm file using you browser
and use the URL:
localhost/mainprogram.htm
The MySQL database tables can be viewed in the textfile "tables.txt", along with some
essential constraints (Primary keys, Foreign keys), and some sample data.
From a MySQL prompt or MySQL console, you might first create the database "project", and then
use that database for creating the tables and inserting some sample data.
Ofcourse, if you look at the SQL code, and e.g. datatypes, you might rightfully say, that better
choices exists. Sure, but it's only an example, and thinking about it is "good".
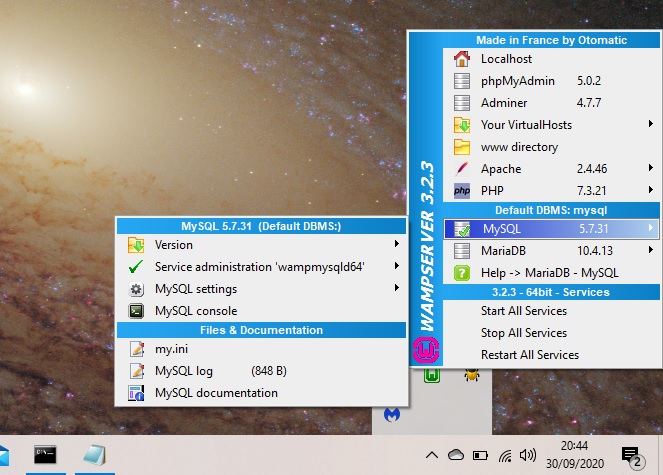
When WAMP is installed, you might start the services using the "Wampserver64" icon, which should be
visible on your desktop. A short while after, at the rightbottom of your desktop, you can get to the Wampserver
menu, from where you can start several utilities (like the MySQL console).
Fig 1.
Section 1. Installation of the App intems:
1.1 Database tables and sample data:
Just take a look at the following tables, and insert queries (to get some sample data).
When in the MySQL prompt (or console), it's probably best to highlight one block of code at the time,
(like a create table statement), and paste it at the prompt. Repeat that until you have done
the whole lot.
Ofcourse, it's nice to study the tables and their structures. It might well be that you see many ways
for improvements. That would just be great.
You can e.g. use the MySQL console, or the pHpMyAdmin utility.
1.2. Main interface (start of program, which is simply a .html file):
Ofcourse, the motor behind the app, are the php files. But most of them, we call from
the main userinterface, which is a simple .htm file. I called it "mainprogram.htm",
but you can create the file with a name of your choosing.
It's an extremely simple interface, and you will see many ways for improvements, I am sure.
Here is the code, which you can open, and paste in notepad (or any other editor of your choice),
and save it in C:\WAMP64\www, or any other appropriate virtual directory, using the .htm or html extension,
and thus do not save it as a .txt file.
If you look in mainprogram.htm, there are several "forms" defined, like the one
where you can enter a new customer. Note the "action" element, at the start op the form, here defined as:
[form action="newcustomer.php" method="get"]
when you have entered a new customer, and click submit, a message will go to the webserver,
not only carrying the data, but also containing a call to the "newcustomer.php" code.
This is how the pHp code on the Server will be triggered to start.
What such code does, will be explained below.
If you scan mainprogram.htm, you will see a number of such "form actions" defined:
Above are the .php files, renamed to .txt. If you want to use them, then save
them with the .php extension in your webdirectory (a virtual directory, or maybe c:\wamp64\www).
Section 2. Discussion of the pHp code:
Since the main htm interface (mainprogram.htm) is so simple, I don't think it's needed
to discuss it any further. Ofcourse, as an "interface", it totally sucks, and is as bad
as can be. However, it's good enough to illustrate a few html form objects, and how to trigger
Serverbased pHp code.
This note is for playing around and learning. In reality ofcourse, creating production code,
you ofcourse create integer and crisp and clean code. That speaks for itself.
Then..., the MySQL database. There are only a few tables, but it already seems like
a real business model. However, many professional programs use many tens, or hunderds
or even more tables, often not for nothing.
My mission here is to attend you on "referential integrety". This can be achieved using
primary keys and foreign keys. For example, you cannot insert a new order with an order_id
and cust_id, if that cust_id does not exist in the Customers table.
Ofcourse, that's not the only way to get integrety. Many sorts of database constraints can be used,
alongside with business rules, and backend code (in the database) like triggers.
Yes, let's go to a short discussion of the pHp code.
First some "good to know" facts:
(1). pHp code usually runs at the Server. The engine and parser are "over there", and a pHp script
is interpreted and executed at the Server, and any results (if any) are send back to the client browser.
If you have installed WAMP on a PC, then the PC is a Web/pHp server too (as well as MySQL), and you are "supposed"
to call pHp scripts using "http(s)://hostname/phpfile.php", which is a true web url.
Even if you work locally, on the PC itself (say called "mypc"), then use "http(s)://mypc/phpfile.php"
or "http(s)://localhost/phpfile.php".
(2). Just like the contents of a html document starts with <html> and </html> tags, a pHp script is code between
the <?php and ?> tags.
You can certainly have a serverpage having stuff like:
<html>
<body>
-- ordinary html stuff
<?php
some pHp code
?>
-- ordinary html stuff
<?php
some other pHp code
?>
</body>
</html>
So, above we have a html doc, with pHp code included. But, a .php file itself, may have
html objects, and other html stuff, as well.
It's indeed true, that many .php files simply "start" and "end" with the usual html tags (<html>,</html> etc..),
but in between many code can be found between <?php and ?> tags, just like the example above.
Now, it's probably best to spend a few hours or so, on a good pHp tutorial.
Ofcourse, there are countless tutorials. I like the one from "w3schools" (easy to find with google),
and in 2 hours (or so), the basics are in your pocket !
I advise: If you "now" study the first 20 items (pages), that would be great.
Ok, now some elements in my code:
1. Function: "mysqli_connect()" to connect to MySQL.
You may see it as an interface to client code (to the database) and a connect string.
A way to hide the password and credentials is to save it in another external file and then include
it in your php script. Use the "include 'path_to_include_file'" statement to use it, like in:
include 'config.php'
where 'config.php' has the approriate security in Windows or Linux, and it contains
possibly all sorts of settings, and possibly authentication parameters too.
Later more on this.
At the end of your program, you should nicely close the connection, for example by using:
// Close connection
mysqli_close($link);
2. Error handling if the connection to MySQL fails:
If the connection fails, it's good to inform the user about it.
That's why we have:
// Check connection
if($link === false){
die("ERROR: Could not connect. " . mysqli_connect_error());
}
So, if we cannot connect to MySQL, we get the message "Could not connect. with the output
of the function mysqli_connect_error()".
The function "die()" or "exit()" terminates the code, while outputting what we have seen above.
3. HTML GET or POST methods and the pHp $_GET:
If we take a look at a form, as defined in "mainprogram.htm", as for example:
[form action="getcustomer.php" method="get"] Get a particular customer (for example A003). Please enter the Cust_id:
[input type="submit"]
then we see that we are supposed to enter one particular Cust_id, and then the Server based
"getcustomer.php" program will look that Cust_id up, from the database, and will present us
with lots of info of that particular customer, like Cust_id, Cust_name, City etc...
How does it work?
In the form you see method="get". That means that once you have entered the Cust_id, and click
the submit button, a message will be generated towards the Server, containing that Cust_id, and triggering
the "getcustomer.php" code on the Server.
Now, the "getcustomer.php" code itself, contains the following interesting statement, namely:
$inp=$_GET["Cust_id"];
The $inp variable, is just a variablename, and I could have named it $quark. As long as it has a name, it's OK.
Now, the program gets the Cust_id by using the special variable $_GET, which will read the Cust_id from the message.
So, all is fine now, since the program has the Cust_id we are interested in, and it will use that value
to construct a query towards the Database.
There are two often used HTML methods for sending information: GET and POST. There are similarities,
and ofcourse differences too. It's a great task, to scout the internet for some articles discussing
those two methods. Please do so.
As you might see in my programs, I use the GET method in HTML to send a message to the Server,
and use the $_GET["data"] php construct, to receive data.
The great thing also is, is that when you send several pieces of data (e.g. Cust_id, Order_id etc..),
the pHp contruct will automatically create an "array" containing those values.
4. Constructing a query in pHp:
(1) and (2) above, and this section, are all about pHp and MySQL. If you do not need to access MySQL,
then those sections are not too exiting ofcourse. However, most business programs will need to access
some sort of database (progress, oracle, mssql, mysql etc..).
And..., the principles in pHp are all the same, so that is the good news.
Now, if your code has implemented stuff as shown in (1), (2), and (3), then at a certain moment your
pHp code need "to formulate" some sort of Query (insert, or update, or delete, or select) and send
it to the database. Here is how you can do that with pHp and MySQL.
Simply create a string variable, like $sql, and set it equal to the actual query, like:
$sql = "SELECT Cust_id, Cust_name, Address, City, Country, Status FROM customers where Cust_id='$inp'";
In this case, we want the customer, where the Cust_id is equal to $inp, where $inp is that variable
as was discussed in (3) above (if needed, consult (3) again).
But, sofar, this is only text assigned to the variable $sql.
But remember, in (1), we already have constructed an open link similar to:
So, we have an open connection to the database, and we are ready to send the query, stored in $sql.
And we can do that like so:
$result = mysqli_query($link, $sql);
where we have used to mysqli_query() construct, with as parameters the open link name,
and the variable which stores the query.
The resultset is already taken care of, and stored in $result.
Often, the code is changed somewhat to take care of error handling as well, as in the example below:
if($result = mysqli_query($link, $sql)){ -- if we have a result
if(mysqli_num_rows($result) > 0){ -- optional: if number of values is returned > 0 -- other appropriate code, depending on the outcome above.
If $result indeed has multiple rows or values, we can process that, for example, by using:
mysqli_fetch_array($result)
please take a look at the code in for example, "newcustomer.php" and "getcustomer.php".
5. The "object->method" and "object->property" syntax:
Today, most dev environments are Object Oriented, instead of "purely" procedural (3GL style).
That has a lot of meaning, and deserves a lot of explanation.
However, the most profound fact is that the dev environments allows for "objects", which are constructs
with internal functions and/or data.
It's a bit abstract ofcourse, but it remotely resembles a sort of container, with "inside", one or more
memberfunctions, and usually some storage facilities for data.
The memberfunctions are also often called "methods".
Both the methods and the data can be "public" (usable or callable by anyone), or "private" (usually
for internal use only).
In many dev enviroments, such a memberfunction is called using "objectname.functionname".
So, a "dot" is the seperation between the objectname and the method.
In pHp, the -> symbol is used for the same idea.
So, suppose we have a class "elephant" (class is a template for new objects), then we might have:
$jumbo = new elephant();
// Let's call one of methods "trumpeting()" to sound it's trumpet, as we assume it was indeed defined in the class.
//Then you would call the memberfunction like so:
$jumbo->trumpeting();
We will see some examples of that later on.
6. More on input and output:
This note certainly is not a "5 Star" description of pHp and the other components.
It's meant for "inspiration", for you, to persue further study.
Input and output to and from a pHp program is very important. Let's see what we can use.
However, there are some more advanced "streaming" functions, and some other options, which I will not show here.
But the more common ones are listed below.
ECHO and PRINT:
The "echo" and "print" statements, are easy to use, and great to send some information
to the user of your program.
See the simple example below. The echo and print statements, are meant to produce the same string
on your screen.
You can paste this code into a new file, like phptest1.php, and try this on your webserver.
Do you have an idea, why I also used this statement "echo "<br>"; too?
To concatenate text with other text, or with a string variable, you can use the "dot", that is ".".
But as an alternative, you can seperate the strings with a comma, in which they are treated as arguments.
Creating a HTML table, using "echo":
=> Formatted table (in a grid):
In my code, for example in "showallcustomers.php", some relevant fields of the Customers table,
are "outputted" into a HTML table. This table will list those fields of all customers.
You may ask whether a html table is the best way to present data. It certainly is not, but it is
just "one tool in our toolkit".
The section in "showallcustomers.php", which creates the html table, is:
...
$sql = "SELECT Cust_id, Cust_name, Address, City, Postal_Code FROM customers"; -- show the sql for ease of reference
if($result = mysqli_query($link, $sql)){ -- If we have results
if(mysqli_num_rows($result) > 0){ -- If number of rows >0, then it's useful to create a table
echo "<table border=1>";
echo "<tr>";
echo "<th>Cust_id</th>";
echo "<th>Cust_name</th>";
echo "<th>Address</th>";
echo "<th>City</th>";
echo "<th>Postal_Code</th>";
echo "</tr>";
while($row = mysqli_fetch_array($result)){
echo "<tr>";
echo "<td>" . $row['Cust_id'] . "</td>";
echo "<td>" . $row['Cust_name'] . "</td>";
echo "<td>" . $row['Address'] . "</td>";
echo "<td>" . $row['City'] . "</td>";
echo "<td>" . $row['Postal_Code'] . "</td>";
echo "</tr>";
}
echo "</table>";
...
As you can see, with echo commands the syntax for the HTML table is listed, which will become
an actual table when the html is generated and send back to the client browser.
Since $result is actually an array of rows, we use the following to catch the values from a row:
while($row = mysqli_fetch_array($result)){
Now, we can address the individual values from the row, by using the index as in $row['Cust_name'].
Actually the $results variable is a socalled "associative array", meaning that we can use the
keynames (like Cust_id, or Cust_name etc..) in the code, instead of index values.
=> Unformatted table:
This time, the output is simply a number of lines of data, namely the rows of the table.
It simply looks like the rows in a common ascii file.